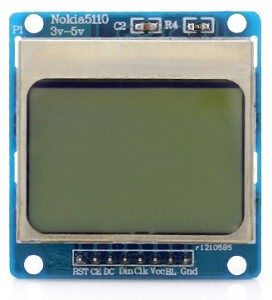
 We purchased one of these very cheap, very cool 84×84 LCD backlit screens off of eBay a couple of weeks ago.
It’s a very nice product for adding visual elements to your projects at a very low price. We paid £3.89 for the screen and it was delivered a few days later.
Take a look below for connection instructions and example code from Adafruit on how to get this up and running with your Arduino.
LCD Specifications
- Controller: PCD8544
- Supply: 2.7V to 3.3V
- Interface levels: 2.7V to 5V
- Backlight Colour: Blue
- Backlight supply: 3.3V Max
- Module size: W 43.6mm x H 43.1mm
- Working current: < 200uA (Backlight off)
Notice that the module only needs 3.3v from the Arduino. More information can be found on the Datasheet located here.
Download the above libraries and rename the dash ( – ) to an underscore ( _ ) in the folder names so that the Arduino IDE can load the library correctly; you’ll know if you haven’t done this as the IDE will show a popup message saying it can’t load the library.
Once you have done that; you’re all ready to hook up the LCD to the Arduino, we used a small where to buy propecia in singapore cheap breadboard for this task as the LCD module came with male pins already attached. As we are using the Adafruit example to get you up and running connect the Pins as follows, example code to come:
That should be everything you need to connect up. The BL is the back light for the LCD module and it is a optional connection.
Once you have everything wired up; fire up the Arduino IDE and load the Adafruit Example Sketch. I’ve posted it below for reference. There are various features such as displaying text, font-sizes, bitmaps and even making basic animations on the LCD.
Some of our photos of the connected LCD Module are below:
We cant really fault our module; we know they’re very old and probably classed as “low tech” compared to some of the nicer LCD or TFT screens out there, but they’re certainly one of the cheapest and easiest to use with the Arduino.
They’re worth checking out, that’s all folks!