 One of the best features about the Intel Galileo is that it has an mPCIe expansion port for adding various cards to it. One of the cards you can add is for connecting to your wireless network.
The steps below should get you up and running with connecting your Intel Galileo up to your network in the Linux environment and through the Arduino code.
Lets get cracking…
The hardware
- 1x Intel Galileo Development Board
- 1x Supported mPCIe Wireless Card (we have a Intel N6205)
The standard Linux image that Intel provide only has drivers for two PCIe wireless cards; The Intel’s N135 and N6205, however it is an x86 processor so if you can get Linux drivers for your card there is a chance it will work on the Intel Galileo.
It is also worth mentioning that the N6205 is a half-size mPCIe card and as such will not fit in the clips on the board. You can buy half-size to full-size adapters that will make it fit though. Let’s get started.
Before any sort of expansion card will work; you must have setup the SD Card with the Linux image provided by Intel. You can find more information on this in our “Getting started with the Intel Galileo” article.
Step 1
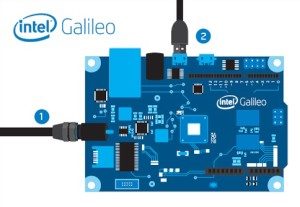
Firstly, connect up the mPCIe card to the Intel Galileo (make sure it is powered off first).
Step 2
Boot up the Intel Galileo (make sure to plug the power cable in, not just the USB Cable.)
Step 3
The next step we used PuTTY to connect to the Intel Galileo over Ethernet (standard CAT5 cable) and entered the IP Address (this was allocated via DHCP and we found this in our router’s “Connected buy soma online with paypal Devices” section)
Note: If you haven’t connected to your Intel Galileo via SSH before; the username is root and the password is blank.
Step 4
Now you should be at the Linux terminal. Enter ifconfig -a and you should see your wlan0 listed in the entries. (the -a parameter tells ifconfig to show all devices UP/DOWN)
Step 5
If you can see the entry in ifconfig; your device is installed and ready to use. Change the following command to match your network setup and press enter
Step 6
Now we’ll want to auto-connect the WiFi once the Intel Galileo boots up; otherwise you will need to connect to the terminal each time and connect it. Edit the following file: /etc/network/interfaces and add an entry underneath your WiFi settings; add auto wlan0
That’s about it! – You can either reboot the Intel Galileo or use ifup wlan0 to bring the device up straight away. You should see it connecting in the terminal; you can check what IP it has been assigned by re-running ifconfig.
It’s time to test it from Arduino code
Hopefully the WiFi is working fine now in the Linux environment; if so we’ll be wanting to use it from Arduino code too. Fire up the Intel Galileo Arduino IDE and run the Examples > WiFi > Scan Networks example. Load up the Serial Monitor and watch it scan networks! – It should look something like the below:
That’s it! – You can now use WiFi in both the Arduino and Linux Environment of the Intel Galileo. Stay tuned for more articles using the Intel Galileo and WiFi.
If you have any questions, comments or suggestions then send us a message by either commenting below or using the contact us page.