 This is something that really interests us, connecting your Microcontrollers up to some sort of GUI in order to control it. This small project was originally just connected using a USB Cable (but that was boring!).
We have connected up a HC-06 Bluetooth module to an Arduino and are able to control it from a VB.NET application.
What’s required?
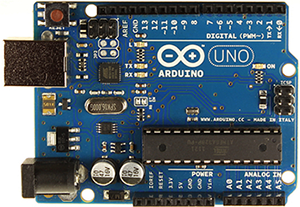
1x Arduino Uno
1x HC-06/HC-05 Bluetooth Module – £4 – £5 online.
Visual Studio (or anything to compile .NET applications)
What can this be used for?
- Controlling any Arduino based applications wirelessly.
- Sending/Receiving data from the Arduino.
- ….anything where you don’t want wires.
Once paired this will create a virtual serial connection between the Master/Slave device – This means you can program your Arduino sketches in the exact same way you would if you were using a USB cable. The .NET application we wrote allows us to Send and Receive this serial information in an external application.
Connecting it up
As the Bluetooth module uses 3.3v logic for RX (and Arduino uses 5v) we need it to make sure we can communicate with it. We have used two resistors 1.2KOhms and a 2.2KOhms to make a voltage divider. This will be used on the Arduino TX pin connected to the Bluetooth RX.
The other 3 pins are straightforward, 5v, TX (to Arduino RX) and Ground. This should be all that is needed to communicate with the Bluetooth module. It should look something like the following:
What this code will do is check for a couple of characters that have been sent to it via Serial – If it detects a ‘D’ then it will output a string of test data. If it receives an ‘L’ then it will toggle the on-board LED on and off. Any other character it receives will be met with an unknown command message.
Note: The Arduino we tested would not upload sketches properly with TX/RX connected. Make sure to disconnect these when uploading new sketches.
Now you have the sketch on your Arduino and have the Bluetooth module connected. You need to connect to this from your PC/Laptop. If you’re using Windows 7 just open up the Bluetooth device manage and “Add new Device” – All being well you should see this device listed. Connect and pair this device using the default passcode of 1234.
Now you’re connected you can test the connection directly; we used PuTTy to open a connection to the COM port that the Bluetooth module was assigned. We quickly tested that the sketch works, see image below:
If you see the above then you know the Bluetooth module is working and that your Arduino is sending/receiving data properly. The next step will be to make this happen in VB.NET. It works the exact same way, we’ll open a connection to the COM port, match up the baud rate and send/receive data.
Please note that this is a test application. You will need to do your own error checking and additional programming, this is just a basic example of how it can be done.
All being well you’ve just added Bluetooth functionality to your Arduino. It’s a reliable, cheap way of removing the constraint of wires when connecting it up to a computer. This also allows endless limits with regards to control, some obvious uses for this would be a data logger, robot/rc car control, making a controller/joystick etc. the list is endless.
If you think we’ve missed any steps here; or have any comments, questions or suggestions then please feel free to leave us a message in the comment section below or send us a message using the contact page.
That’s all for now!